The problem
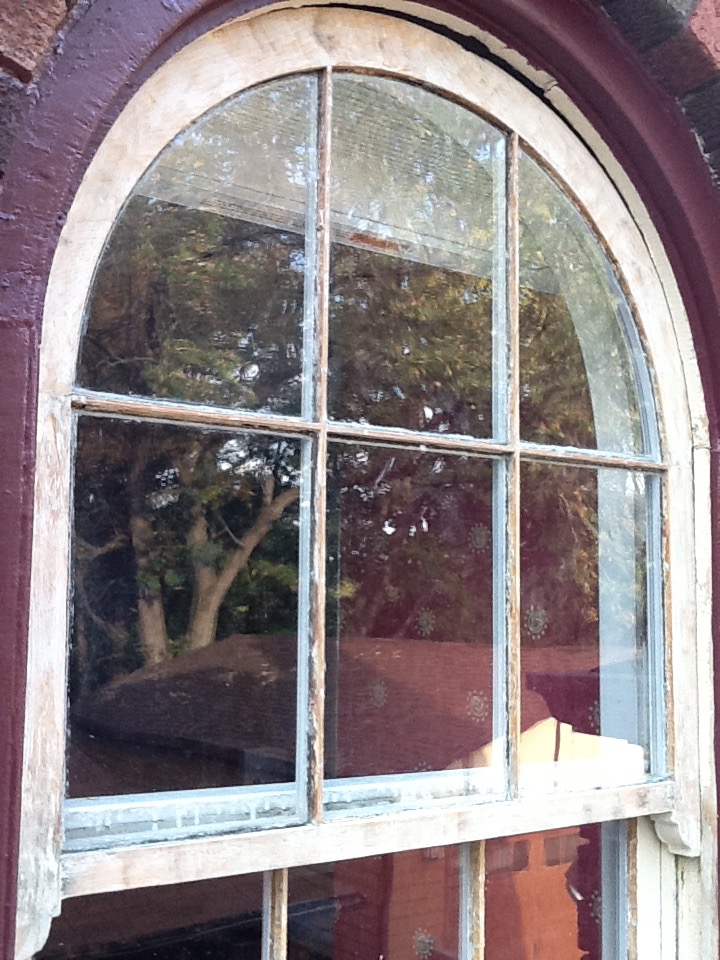
June 5, 2017: For years it's been easy to ignore our second-story double hung windows, which are original to our 1929 two-story tudor brick home, as we long ago covered them up with translucent pleated shades. Out of sight, out of mind, as they say. But back in March as I started opening shades to let in the spring sunshine, I gained a firm grasp of the obvious: all nine of the upstairs windows were in need of restoration due to cracked paint and some minor water damage. In addition, four steam radiators, nestled under each roundtop window, were in need of a new paint job.

Prior window work
As a bit of background, I had already dealt with the window exteriors some 5 years ago when I engaged a local workman with expertise in window restoration (rest in peace, Brian Smith) to re-glaze and repaint the exteriors of all 27 windows on first and second storeys. At that time I made the unpleasant discovery that our windows were installed with an unusual and (in the restoration trade) notorious type of weatherstripping that consists of interlocking zinc strips at each sash/sill junction. The strips are recessed into the frame in such a way that the sashes can't be easily removed without disturbing and possibly damaging the weatherstrip. I've subsequently learned that for some of the sashes, non-destructive removal is possible, but at the time Brian had never encountered this type of window sash and he elected to do the restoration "in place". That is, instead of removing first the bottom sash, pulling out the parting bead and then removing the inner sash so they could be taken to a workshop for re-glazing, Brian did all the work from a ladder perched outside the house.

Brian also refinished all the first floor windows, by gently sanding, staining and sealing with his own concoctions for a rich red oak color:


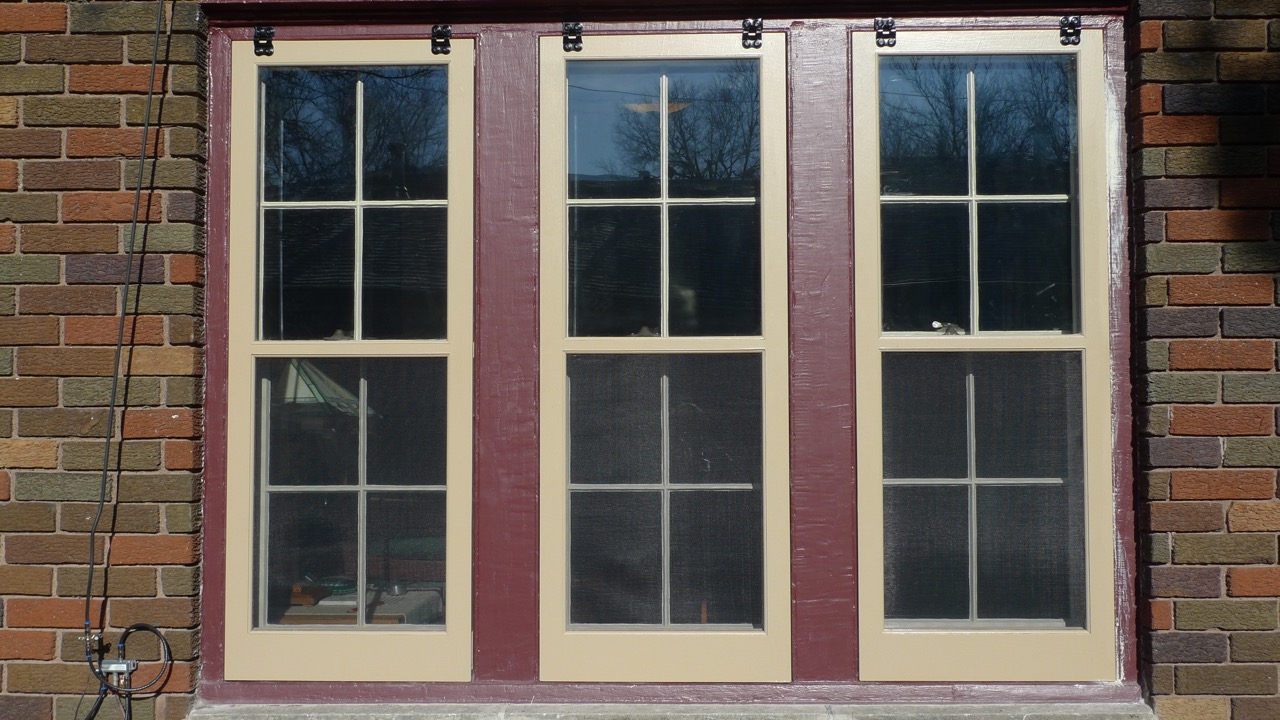
Prior to the window work, I had replaced the old aluminum storm windows with wooden combination storm windows from John Spencer in Lincoln, NE -- a more fitting style for our house, albeit a lot more work because I had to do all the pre-measuring and installing (with metal hangers) myself. But the outcome looks great.
Back to the present
1. Windowsills
At least half of the second-storey windowsills had rotten sections that needed attention. The solution: Chisel out the soft wood, apply RotFix epoxy compound to inhibit further rot, and rebuild with Sculptwood.


Tip: Keep cats away from the window when curing sculptwood!
2. Stripping the Paint
I decided early on that this would be a "damn the torpedos, down to the bare wood" project. Too many layers of paint, some in poor condition, to be satisfied with just a scrape and a promise. This is one of the least fun jobs in the universe. This is obviously an exaggeration, but it really is an unpleasant task in all aspects. Not the least of these was finding a paint removal method that was effective. I tried them all - in the end, the best option was a good quality stripper with methylene chloride, applied heavily in multiple applications. This required full face respirator, chemical-resistant gloves, old clothes, cats and spouse removed from the area, and good ventilation to remove fumes. An that's just for the application stage! The next fun comes in scraping and disposing of the uplifted paint, without damaging either wood or glass. In the end I found paper toweling was the best medium for wiping and removing the goo.
3. Sash Weights and Pulleys
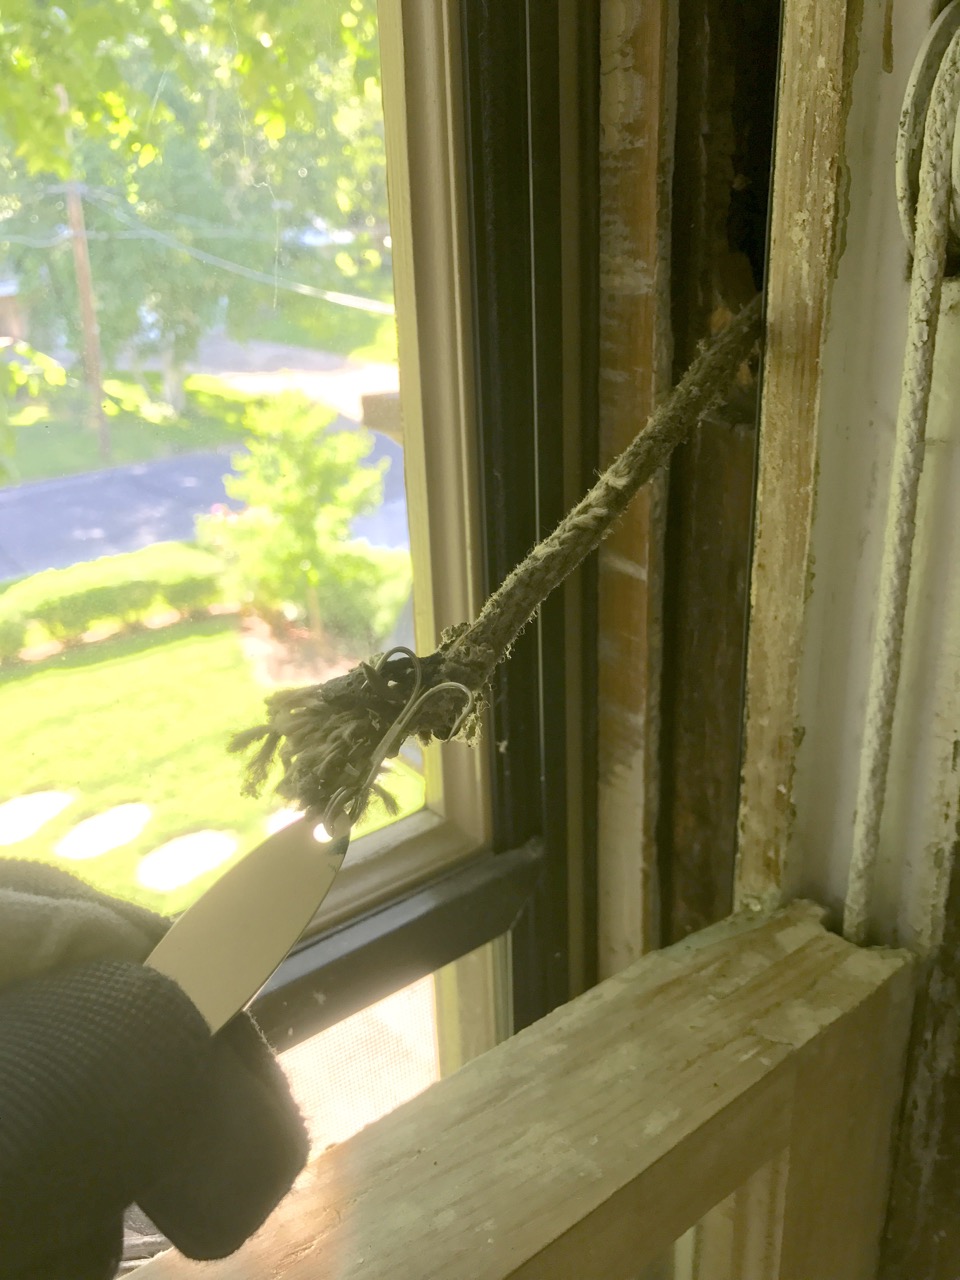
With most of the panes not easily removable, broken sash cords constituted a head-scratcher. Normally one would be able to access the sash pocket once panes were removed, in order to restring the weight and attach it to the sash before re-hanging. No such luck for me! When I causally mentioned to Carol that I wished I had a way to fish the lost cord up from the top, she (being from a fishing family) naturally suggested a fishing hook! I found a trident hook in my long-disused tackle box and, after attaching it to a strong cable, I lowered it into the pocket through the pulley opening (having previously removed the pulley). The very first cast netted me the end of the cord! I pulled the weight up to level with the opening, secured it temporarily with a long deck screw, untied the old rope and attached a new rope using a zip tie.
There remained the not-insignificant problem of how to reattach the new rope to the sash without removing it. Normally this is done via a knot in the rope that is nailed into a countersunk hole on each side of the sash. I found what I thought was a clever solution with a modified toggle bolt that could be pushed into place along the groove-- the bolt would spring open where the knot would normally be. But I found this a bit too flimsy in practice, so I endedup 'forcing' an old-fashioned knot along the groove on each side of the sash using a U-shaped plastic guide until it 'found' the hole. This resulted in a proper sash hang, although without a nail to secure the knot in place (no hope of that!) I am forced to admit that my solution might one day fail.

The sash weight is lifted up and secured temporarily in place

New rope can be attached to a zip tie around the weight
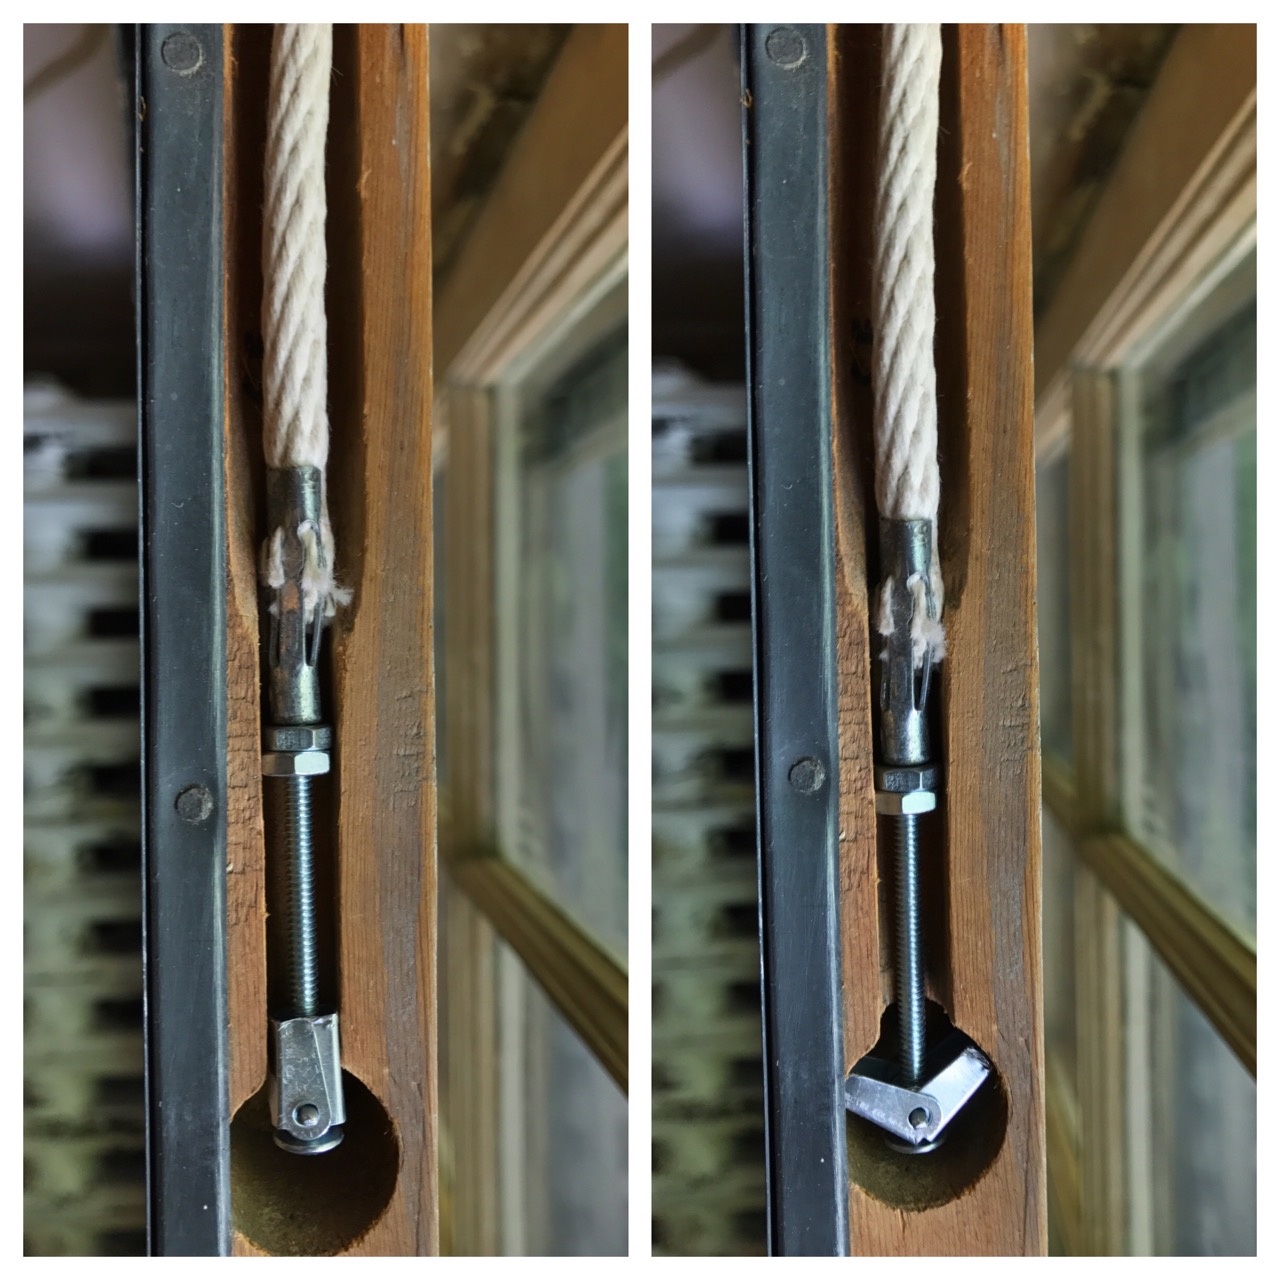
This scheme Didn't work: Insert a Modified Toggle BOlt
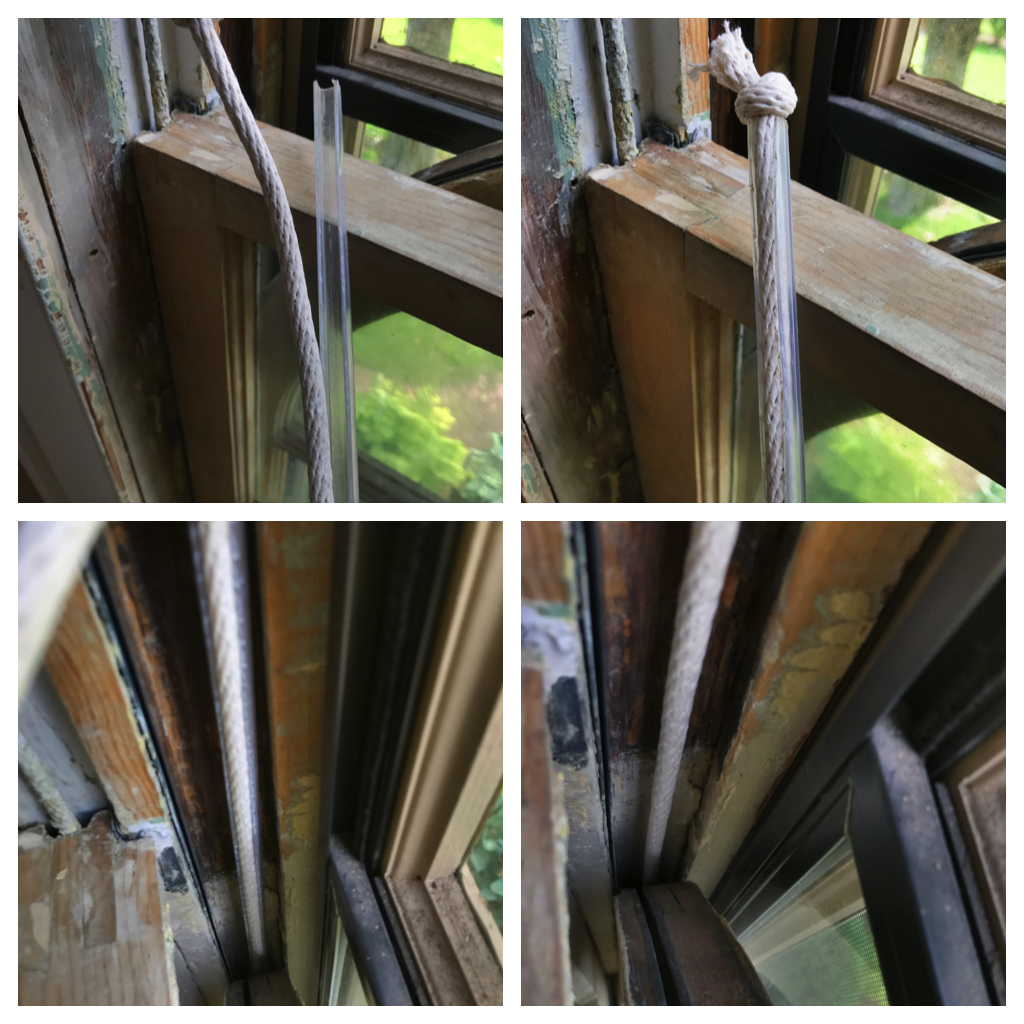
This scheme did work: Force a knot down into the sash channel