Making the Gnotebook (this page is under construction!)
The steps below represent my current production methods for the iPad Air case I sell on Etsy; similar methods apply for the iPad mini cases. They are meant to give a general feel for how the cases are made, but not all critical dimensions (e.g. for magnet placement) are included here. Once I get around to it, I will provide templates and tool descriptions for anyone wishing to tackle their own case building project! See project page The Gnotebook for photos and specifications of the final product.
Safety First!
- For any step involving cyanoacrylate (CA) adhesive ('super glue'), be sure to protect yourself from exposure to fumes that arise on bonding. For bulk applications (e.g. sealing paper block), I use a full face respirator, available on Amazon. Use gloves to protect your fingers and hands against contact with glue, and be respectful of this glue's innate ability to go places where you don't want it to! This means using appropriate applicators, spill pads, and wipes. And keep a bottle of un-bonder on hand if necessary!
- Safety first also applies to any cutting, sawing, or drilling steps - any such tools need to be used with proper care and protection against injuring yourself (eyes, body parts).
- Some precautions about neodymium (rare earth) magnets are in order. Follow precautions provided by the supplier, and keep all magnets out of reach of children, pets, or anyone with internal medical devices that might be sensitive to magnetic fields. Like superglue, they require care in handling and can end up places you didn't intend them to go.
- Finally, a word on behalf of your precious iPad (or other tablet) as the object of all these efforts. Make sure it doesn't become a victim of unexpected glue spills, knife cuts, or tumbles to the floor. In particular, NEVER expose the iPad case (or any aluminum object) to cyanoacrylate fumes!! Make sure any CA-glued surface, however small, is THOROUGHLY set before bringing into close proximity to the case. Otherwise, the fumes can and will PERMANENTLY dull the aluminum surface! [insert sad trombone here]
iPad Air Case
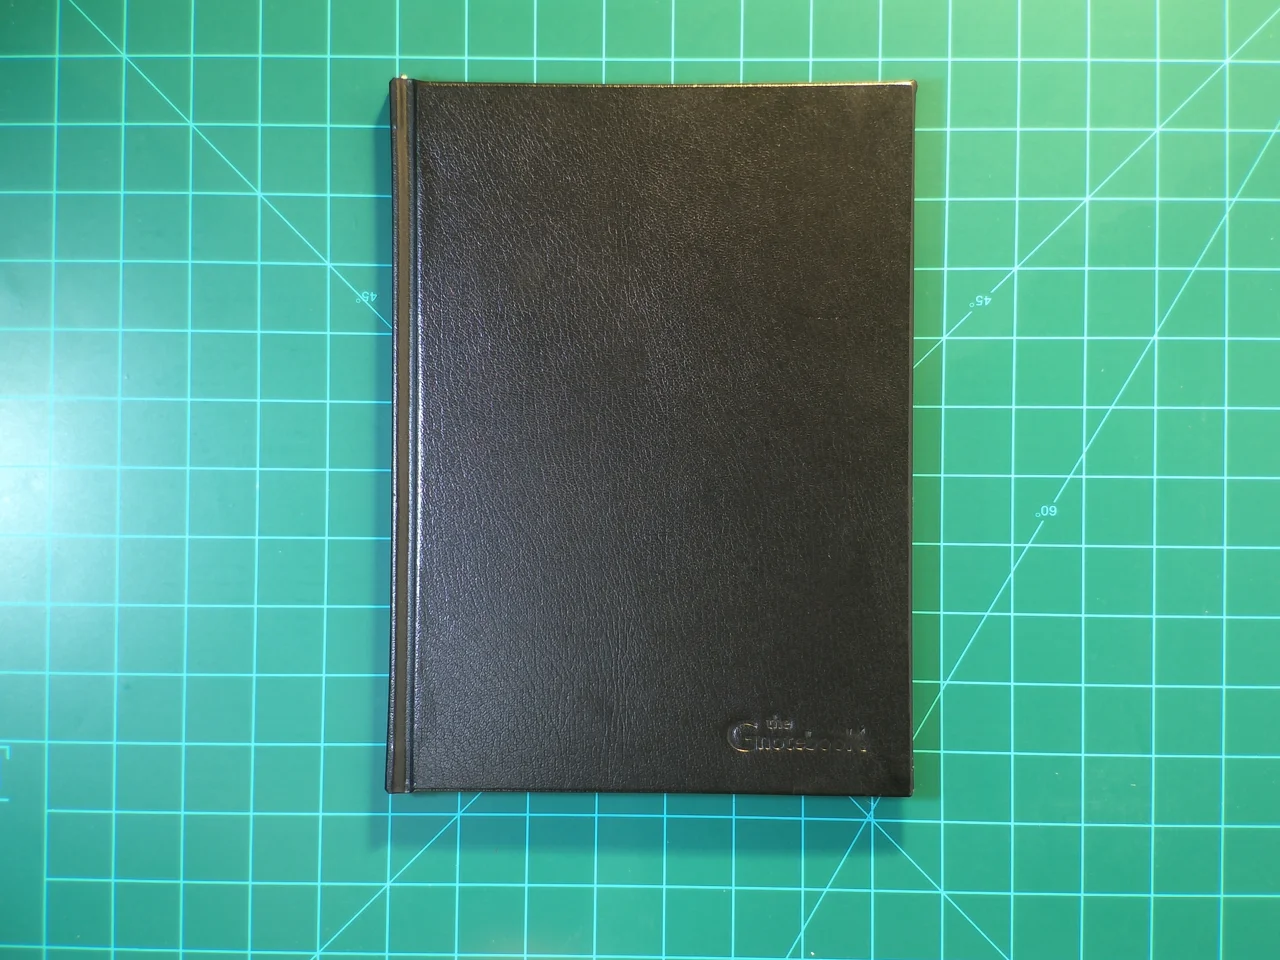
This video will give you a sense of how the components come together to make a finished product. The case is a Gnotebook Air with black bonded leather cover.
Tools:
1) A precision paper cutter to cut paper to correct size for frame. Frame dimensions are fairly critical because the final frame thickness is minimal, so small errors make a big difference. After considerable research I settled on the Dahle 15E with flat blade and built-in paper guide. However, I had to correct the frame for slightly out-of-square to provide sufficient precision in cutting angle.
2) Metal guide or frame with clamps, for cutting out pages

I use custom-machined aluminum frames for cutting out the page block, but it's possible to use improvised clamps built from steel Mending Plates (1 1/8 Wx12 inch) to secure each side in turn.
3) Frame with teflon or smooth plastic inserts and corner clamps, for impregnating glue/resin in pages
4) Scroll saw with fine blade
5) A drill press with a 5/8" capacity chuck. I purchased an inexpensive drill press with 1/2" chuck at a hardware store and ordered the 5/8" chuck from a speciality tool company.
6) An assortment of hollow drills, from largest to smallest (diameter): 1.0 inch, 0.75 (3/4"), 0.375 (3/8"), to be used for drilling out paper and/or cardboard at various stages:
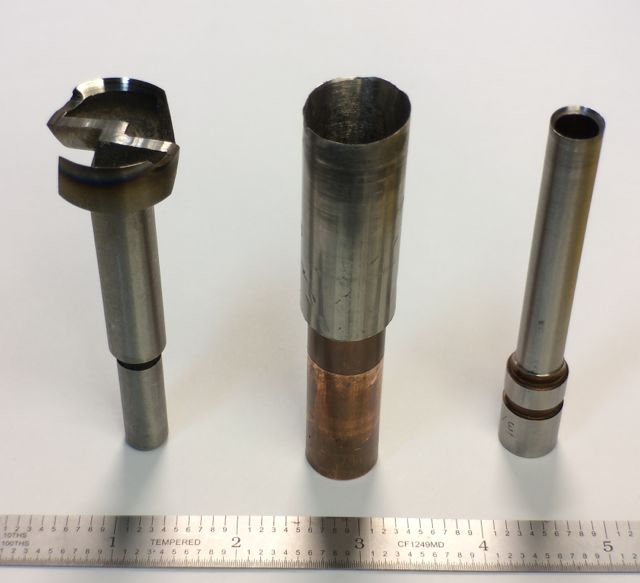
The 1" size (for camera opening insert) is made from a Forstner bit with the center portion filed down to 1/8" clearance.
The 3/4" size (for rounded frame corners and camera port) is made from 304 stainless tubing (3/4" OD, 0.065" wall) sharpened to an acute angle with a section of 5/8" pipe inserted as the shank for a 5/8" drill chuck.
The 3/8" size (for recessing magnets) is a 3" commercial paper drill, Lawson type.
7) An assortment of razor-sharp cutting implements.
8) A set of 3/16" Masonite boards with recessed brass rods (3/16") glued on on end of the smooth side, to be used in pressing bonded leather covers.
9) A book press or equivalent, to supply even pressure to covers after gluing.
10) Rulers for measuring/cutting. The most critical one is a precision metal ruler, 12-inch metric/decimal type. That is, it should be graded with tenths of an inch. This is used primarily used for marking the frame and cover dimensions, and for making tempates. I obtained a nice one here. You will also want some longer rulers for measuring/cutting the long dimensions of binder's board, cardboard, bookcloth and bonded leather.
11) A self-healing cutting board, 3 ft or larger. Any hobby or fabric shop has these.
Part 1. Frame
Steps
Materials:
8½ x 11 inch paper, Southworth 24 lb 25% cotton laser and inkjet 500 sheets for $26.00 - 8 covers
Extra-thin super glue (hobbylinc.com #HCL104 - 8 oz / 227 g for $25 or $0.11/g) - approx. 7 g each (inside and out)
8 N42 magnets (¼ dia x ⅛ inch) 0.14 each
1. Sort paper into sets, 10 sheets each set - 62 sheets ea.
1. Cut paper sets to size using Dahle cutter to exact dimensions: 9.9 x 7.2 inches - 62 sheets ea.
2. Clamp 62 sheets (blocked carefully) in teflon frame, and seal outside edges using extra-thin superglue ~ 3 ml
2. When dry, score with pencil for 3 0.2 inch margins (use guide)
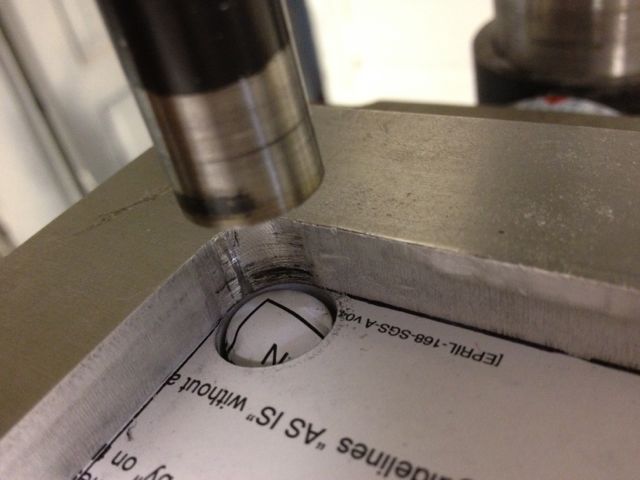
3. Clamp in aluminum frame, adjust edge dimensions, drill corners with 0.75 inch dia paper drill (each side halfway) - 2 min
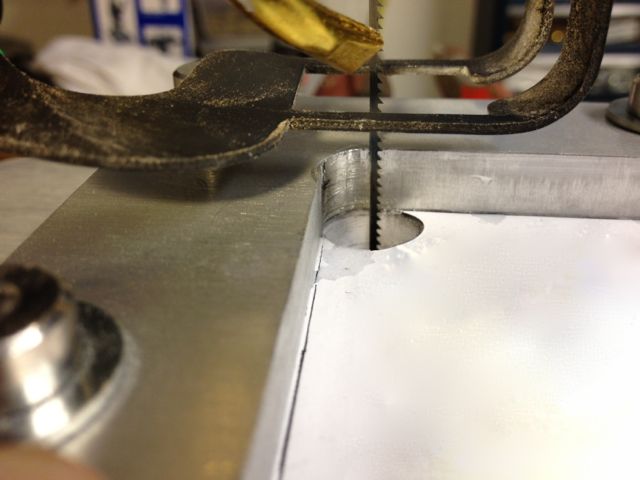
6. Assemble scroll saw in hole and cut interior using frame as guide, remove from frame
4. Clamp in teflon frame and seal interior edge using extra-thin superglue
5. Clamp rear edge in aluminum frame and drill 6, ¼ inch dia x 3/16 inch deep holes spaced 4.15” on back edge
9. Drill 2 ¼ inch x ⅛ inch deep holes in front top corners of frame, centered and sanded to flat surface
7. Super glue 6 N42 magnets (¼ dia x ⅛ inch) in spine flush to surface, alternating N - S top to bottom
8. Super glue 2 N42 magnets (¼ dia x ⅛ inch) in frame corners, clamp with pliers to insure flush to surface -N up.
6. Cut 3/16 inch wide diagonal trough in lower right corner w/ model saw to 1/32 depth, stretch & super glue elastic, trim ends
Part 2. Cover
Materials
Davey Board
Bonded Leather (Talas)
Conservation Board 0.030
Cardboard stock 0.058”
Bookcloth (from Talas or Hollander's)
Magnets ¼ x ⅛ 1/32 inch 65 total
Magnets N52 ⅜ x 1/32 11 total
Steel shim 1 inch OD ⅝ inch ID 0.015 inch thick , 2 per board
Extra fine sandpaper
Spray Mount adhesive
Drafting tape
Extra thin super glue
Cover Boards: Do set of 8 boards at a time max.
Cut left and right cover Davey boards (2 each) and conservation board (2 each) to 10.1 x 7.0 inches
Cut triangle in right Davey board
Drill camera port hole (1” dia) using Forstner with filed down center portion (but with center point)
Drill 1” circles from 0.09” stock using Forstner with filed down center portion (no center point)
Drill rounded corner of triangle (¾ “ dia paper drill)
Drill cap magnet hole (⅜” dia paper drill)
Cut 2, ⅛” x 7” slots in left cover cons. board for magnets using ⅛ “ apart parallel blades affixed to Logan
Drill 2, ⅜ “ holes in left cover conservation board for magnets
Lay out 4 left cover cons. boards face down on kraft paper; spray 4 x 4 pass per board with spray mount,
glue to davey boards
Tape magnet template strip behind each slot, insert magnets, arrange evenly, place drops of thin super glue 2x in between to set, sand lightly, then place drafting tape over magnets to protect
Glue in wake/sleep magnets with thick super glue, press down firmly and sand lightly with extra fine paper.
Lay out 4 right cover Davey boards face down on kraft paper; spray 4 x 4 pass per board with spray mount,
glue to right cover conservation boards. Press firmly to seat. 2 hr.
Glue ⅜” x 1/32” N42 cap stowing magnet in place using thick super glue, glue ⅜ “ cons. board disk above it
Cut 1/16” foam using scroll saw, cut into triangles to match inset in right cover.
Glue foam in to triangle (apply thin layer of PVA with finger); glue 1” circle (0.09” stock) into camera port (apply thin layer of
PVA with finger) - 1 minute.
Spines: Do 24 at a time
Cut 0.058 inch cardboard to 10.1” width
Cut 0.030” conservation board to 10.1” width and score (not all the way through) 0.5” increments (do 24 at a time or 12” length) - 0.5 min each
Mark 1.51” from cons. board end - then 1.41- 1.41 - 1.41 - 1.41 - 1.41 - 1.41 (last mark is 1.51 from top end) - mark pencil -0.5 min each
Drill 6, ⅜” holes with paper drill in each row of cons board, centered on lines. Use 0.058” cardboard backing on wood; disk should stick to cardboard. - 1 min each
Spray both top of cardboard and underside of cons. board (w/ respect to hole cut) with 4 x 4 sweeps of Spray Mount, and fit carefully together, press with roller. Then quickly affix N52 magnets (⅜ “ dia x 1/32”) by sliding bottom member of long magnet stack into place and immediately pressing down with finger of other hand. Tape lightly with drafting tape after each row. Do all N facing magnets (rows 1 3 5) first and then S facing magnets (rows 2 4 6)- 0.5 min each spine
Cut along partial cut lines to liberate each spine. Store sandwiched between corrugated cardboard strips to avoid pulling magnets out of place.
Camera port
Bend 1 steel shim ⅓ of diameter down, at 45 degree angle, using vice; snip close to bend with tin snips
File down to even 1/32 inch. Place 3 magnets (¼ x ⅛ x 1/32 inch) on underside of shim, at 2 6 and 10 O’clock.
.Magnets are oriented S - N - S (facing up).
Place a second shim on top, held by magnets and resulting in a cantilever.. Align the two shims carefully and
infuse a small amount of extra-thin super glue into the gap, all the way around, to secure the assembly.
Trim the 12 o-clock edge of the shim by about 0.5 mm (⅓ inch length) using tin shears.
Take scrap bonded leather strip at least 2” wide, lay on scrap Davey board and fold 1 inch under.
Align 0.75” paper drill bit so it barely is off the end, and drill out a partial circle, so as to leave about ⅓ inch uncut where the
leather folds over. Retract drill bit quickly to avoid damage to the partially-cut circle of leather.
Cut carefully with fine scissors to extend this intact end into a ⅓ inch wide flap like a lollipop handle, at least 1” long.
File down or trim with shears a steel slug end, creating a ⅓ inch flat surface, and glue this to the leather,
lining up the flat with the flap.
Bonded leather exterior and bookcloth
Cut leather to 11.6 x 17.0 inches using template; cut bookcloth to 10.1 x 15 5/16” by y using template. Set aside.
Lay leather on butcher paper on a flat smooth surface FREE OF DEBRIS, PARTICULATES.
Trace board outline to 10.1 x 15.5 “ using template. Also mark spine position using template.
Make sure margins are equal (0.75 inch).
SWEEP LEATHER AND BOARDS CLEAN. Have a damp towel handy.
Apply PVA glue to spine, wipe excess and press down until set.
Apply PVA radially and evenly to each panel in turn, but minimize coverage of spine spaces and edges to be folded over.
Put 0.4 inch spacer in place and carefully align board in position. Press with roller.
Repeat with other panel.
Cut 45 degree diagonals leaving ⅛ inch gap to corner. Apply glue to bottom margin, fold and press in place.
Flip 180 degrees and repeat with top margin.
Flip 90 degrees. On both ends make tiny fold with thumbnail and turn flap over with 2 mm overlap at bottom, tapering out
halfway to edge. Now apply glue, spread evenly and carefully fold both ends up. Press hard and continue pressing middle
portions till set. Use bond knife to press folds.
Turn 180 degrees and repeat with other end.
Quickly before glue dries, press ends towards spine while holding down spine, to begin creating the folds.
Now wipe away excess glue front and back. Don’t worry too much about glue in areas to be covered up, but be sure to
REMOVE ANY PARTICULATES from the region to be glued next.
Insert 2 3/16” x 7.5 x 10” masonite inserts (BRUSHED CLEAN) . and sandwich with 2 more masonite boards (BRUSHED
CLEAN) 3/16” x 8 x 11. Insert brass rods (1/8” dia) in creases and carefully load assembly into book press.
Press for 1 hour under moderate pressure.
Cut shallow ⅜ inch holes for case magnets in top corners, remove leather center, and glue in ⅜ “ dia 1/32 N42 magnets
with S pole facing up (DOUBLE CHECK THIS)
Proceed next to camera cap installation BEFORE glueing bookcloth!!!
Camera cap installation
Remove and cut away excess leather around camera port hole
Using 0.75” paper drill, carefully drill out the camera port, centered in the 1” hole, starting from the inside, and with a scrap
Davey board underneath. Now retrieve a cap assembly that matches color and grain.
Lightly sand the margins of the hole to enlarge it for a better fit, and test the cap until a smooth fit is achieved.
Mark the 12 o’clock point on the underside of the shim assembly (center of cantilevered portion)
Test its fit in the case opening and trim opening as necessary.
Line up the cap in the opening with the flap extending towards the cover corner-- should be 45 degree angle.
Fold the cap back to simulate open position and pull the flap towards the corner. This is to insure the flap is long enough
to support an open cap when the shim is inserted in the next step.
Carefully line the interior hole margins from 2 to 10 o’clock with thick super glue and insert the shim. The flap should
extend out from the shim. Press shim in place all around. Now glue the flap from the shim extending about ¼ inch.
Cut off excess flap.
Now turn the assembly over and trim any excess glue on the exposed shim surface. Test the cap fit and ease of removability, and sand if necessary to optimize fit.
Bookcloth
Pre-fold the bookcloth by laying it out on top of the open book and, using fingers, crease the edges around each spine gap from left to right. This is necessary so that there will be sufficient play to allow completely folding the cover behind. The bookcloth legnth has been adjusted to allow for this extra folding.
Now lay out butcher paper,SWEEP CLEAN the bookcloth on both sides and place bookcloth on butcher paper.
Also SWEEP CLEAN the book interior and smear a little PVA glue in the slots to help with adhesion.
Now spread PVA glue radially and evenly on the bookcloth to form a thin coating. Remove hairs, particulates.
Lay bookcloth on cover, starting with left side and first address the cover crease before continuing to lay the bookcloth down in the spine area and finally the right side. Pay attention to the margins top and bottom as you go, and adjust sideways as necessary when you reach the spine, to insure an even fit. Press down evenly and then use clean roller to roll out the edges and interior.
Install interior magnet strip
to be added
Install cloth holder (sticky dot)
to be added