Raised Beds
We gained valuable sunny space south of the patio last summer, with the removal of some large columnar white pines on our fenceline (they were diseased, messy, and starting to lean). In the aftermath, a patch of formerly happy hostas cringed and pleaded to be moved, but a whole new class of plants beckoned: vegetables! But with limited space and the opportunity for some architectural interest around the patio, raised beds seemed like a natural choice in which to grow them.
The Project
Tree removal

Sad to lose trees
The columnar white pines had outgrown their usefulness on this fencerow. But it's never a happy occasion to lose a tree.

TREE JOCKEY
Getting them removed professionally was not trivial -- it involved lots of high ropework and careful topping/lowering of timber.

A new look
Our patio space is transformed with the removal of these trees! (The stumps were also removed after this photo was taken.)
Raised Beds: Why, What, Where
I read as much as I could online about raised beds. Predictably, there is a lot out there! The key advantages to raised beds seem to be the ability to provide good quality, fertile soil over a large vertical space, which lets roots penetrate deep. Depending on bed depth, this may allow for closer planting as roots don't have to compete laterally. Another stated advantage is ease of maintenance without stooping and bending. (This is without regard to all the stooping and bending required to create the beds in the first place, but that's another story!)
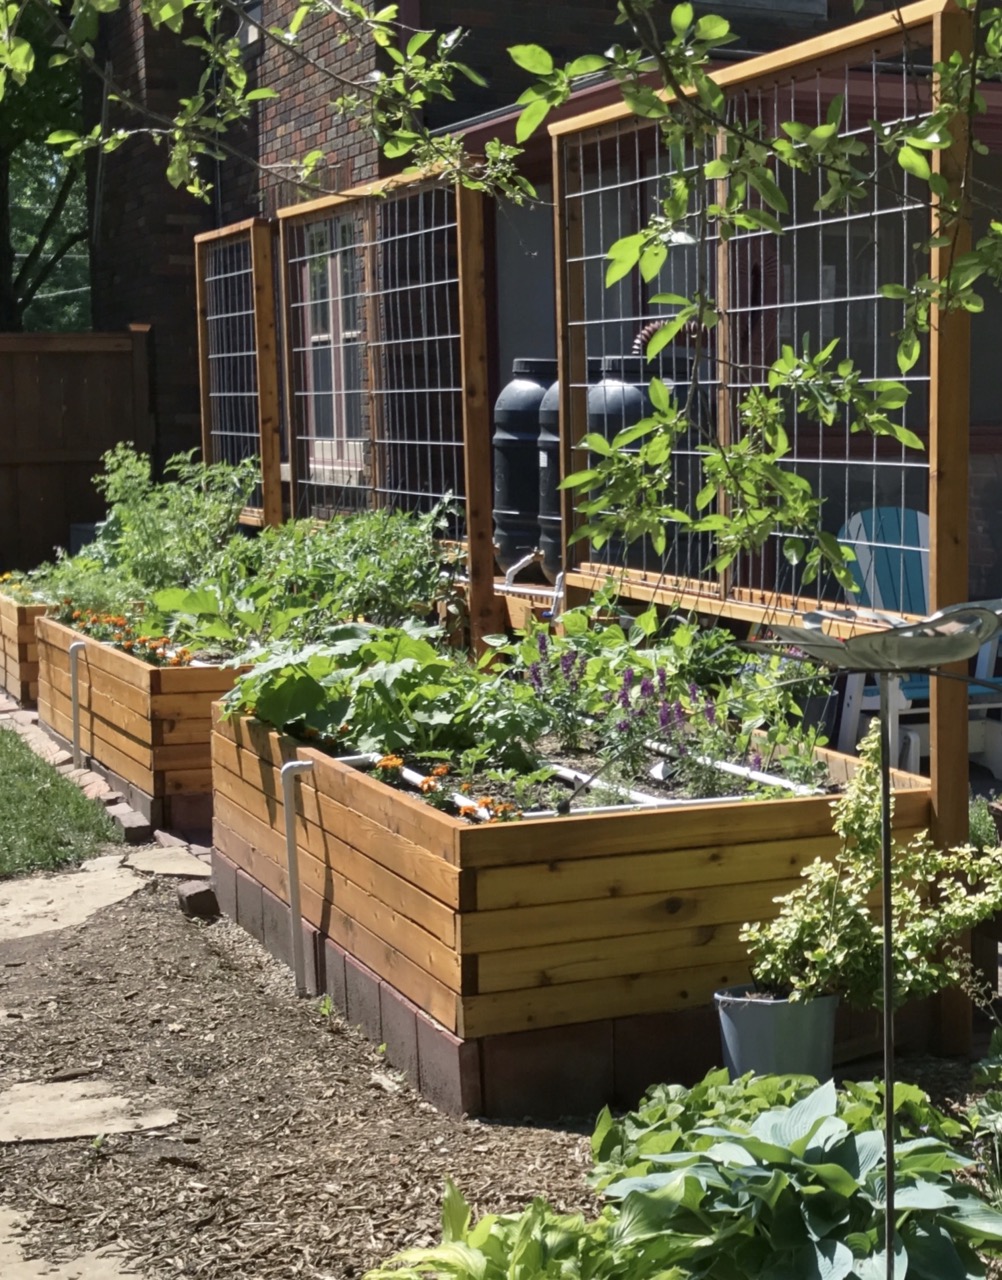
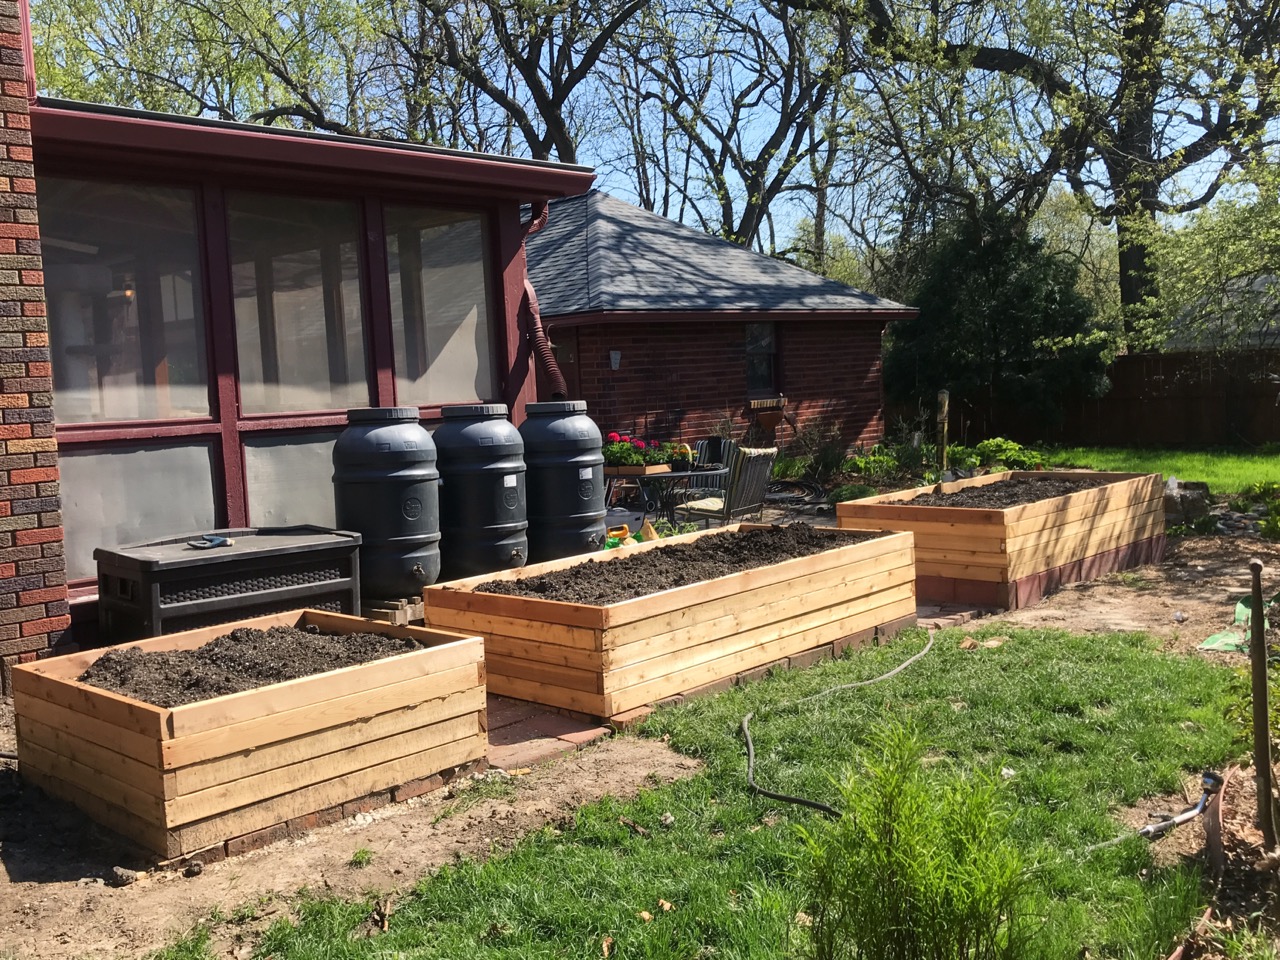
The tree removal released about 20 feet of usable linear garden space (defined as having about 6 hrs direct sunlight per day) along the fence. How best to use it? Although N-S orientation is often recommended for rectangular raised beds, I went with E-W because it seemed to suit the space better. In the end, I decided that one 4x4 and two 4x8 foot beds, with space in between for access, would work well in the space available. The west bed will get shaded first in late afternoon, so I will adjust plantings accordingly.
Bed Design and Construction
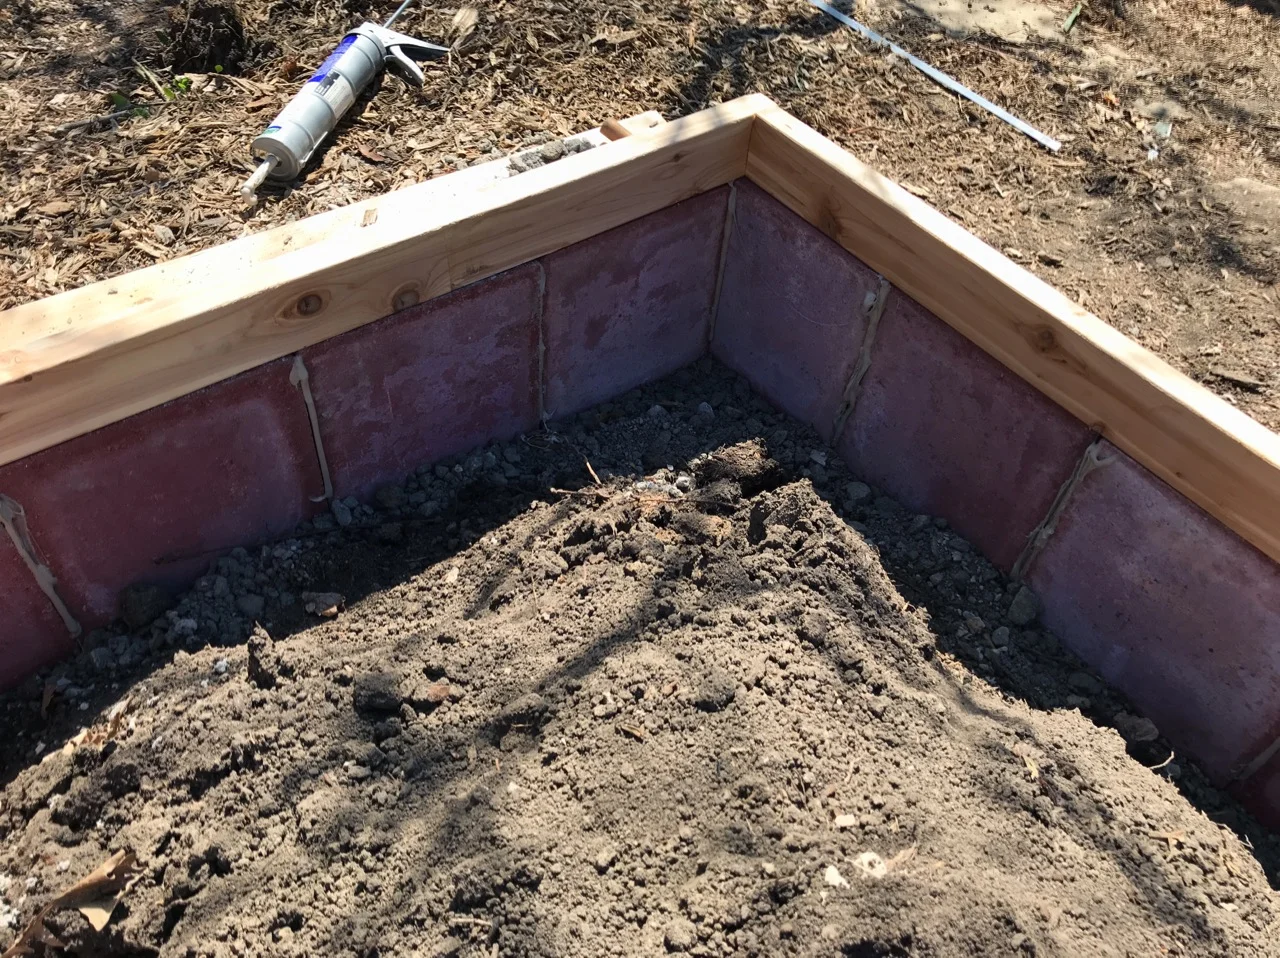
The bed design I went with was relatively simple -- I envisioned using patio blocks or bricks standing upright to form the base level in contact with the ground, and cedar 2x4's for the upper walls. The cedar boards are easily butted together to form rectangles/squares using 3" stainless steel deck screws, with the aid of a starting drill hole to avoid splitting. I was shooting for a maximum of 24 inches of bed height, achievable with 5 rows of 2x4's on top of 7 inches of patio brick above grade.
Executing this design on the site was a bit challenging, partly because of the grade from one end to the other: I wanted the soil surface of all the beds to be at the same level, so that drip irrigation could be delivered evenly by gravity. So the west bed needed only bricks below the timbers, whereas the other two beds required the taller patio squares.
I created foundations for the bed walls consisting of about 4" depth of paver base in a narrow trench that allowed a portion of the blocks to remain below grade. The paver base was leveled out and the patio blocks or bricks arranged on top to form the base portion of the beds. I used a simple string method to adjust the 3 bed bases to the same approximate level. Then the patio blocks were cemented in place using landscape adhesive.

I should mention that I also added a few rows of paver brick behind the beds, underlain with paver base, connecting them with the existing patio and porch.
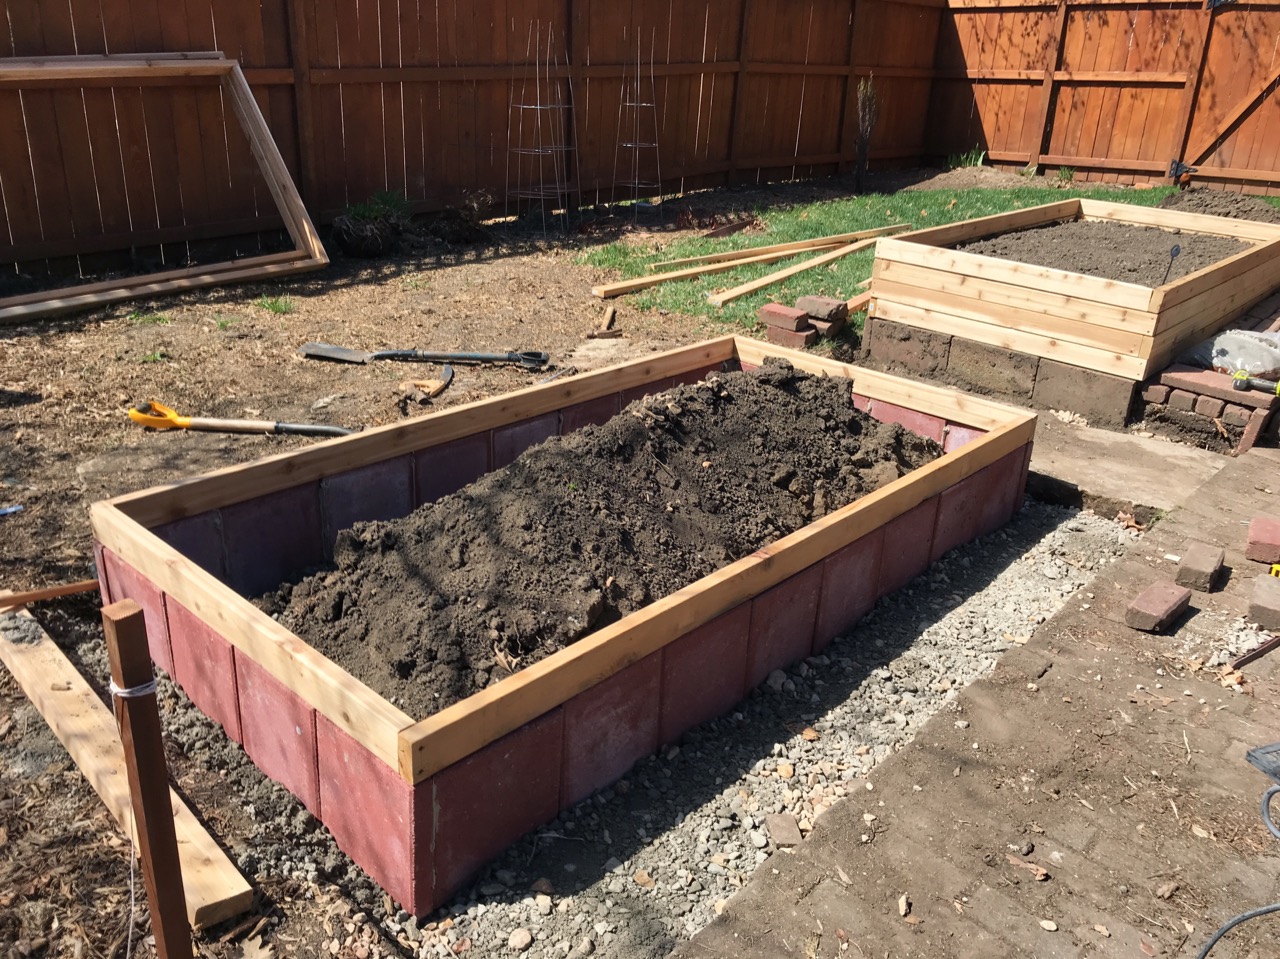

Next the timber rectangles were stacked one at a time, with adhesive under each. For one bed I included 2x2 cedar posts at the corners, but I didn't continue this with the other beds, instead screwing each square to the one below at each corner using an angled 3" deck screw. That together with the adhesive made for a very rigid wall structure. I did, however, affix 2x2 cedar stakes midway along the 4x8 beds and attached a crossbeam near the top which will (I hope) minimize bulging.
The only thing I'd change if I did this again would be to add some chicken wire or similar fencing at the base of each bed, as a precaution against burrowing critters.
Soil
The soil base was a stash of 3 or more cubic yards of good, composted soil I'd accumulated over the years behind the garage. I amended the soil with several types of bagged, composted manure and a mixture of bulk Perlite and Vermiculite (Home Depot) for additional water retention and to improve drainage. I avoided peat moss as I wanted to minimize acidification. The approximate volume ratios were 5:3:2 soil:compost:mineral, but this is a very rough estimate. I added soil in layers, with compost and minerals mixed in thoroughly at each layer. This was a lot of work! I am not anxious to do this again. But the result was a beautiful soil texture that I hope the plants will appreciate!

Wood treatment
After the beds were filled with soil I treated the exposed surfaces of the boards with Penofin Red Label Exterior penetrating oil. This is a high quality, one-coat treatment that should preserve the cedar tone for years before requiring a refresh. The wood in contact with soil is untreated and will weather accordingly.
Trellis
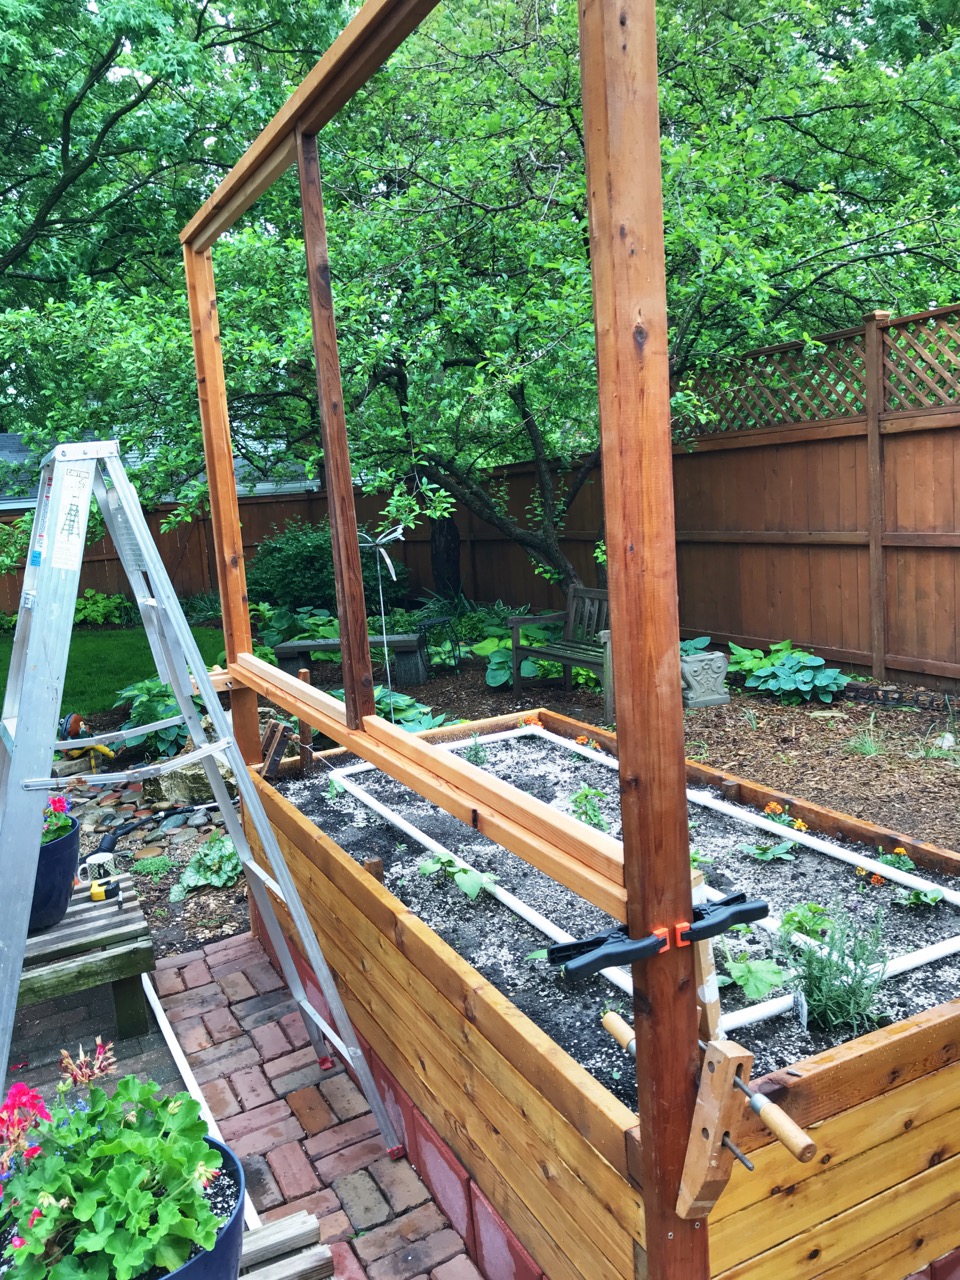
Having give roots a generous amount of vertical space, I wanted to take my vertical garden up a notch with some trellis work. Beans, peas, and vining tomatoes could reach up and find more sunlight that way. I found a neat design online: https://www.hgtv.com/outdoors/gardens/garden-styles-and-types/build-a-raised-bed-and-trellis-pictures and, with some modification of dimensions, was able to create some trellises extending 6 feet above each bed. These were constructed from 2x4 and 2x2 cedar (treated before assembly with Penofin), and sections of 48", 13-line livestock fence (from Fleet/Farm) that was attached to the 2x2's using coax cable ties. I allowed 12 inch clearance under each trellis, with the idea that bamboo stakes could give plants a "leg up" until they reached the trellis.
Irrigation
I've had rain barrels next to the porch for almost a decade, but I'd only used them for filling watering cans for spot watering. Now they were going to be the source of a drip irrigation system for 80 square feet of beds! First, I needed more height to provide adequate pressure to the tall beds, so I built a 3 foot tall stand from cedar to replace the old supports. I also replaced the old, rusty turncocks with quarter-turn ball valve spigots. I connected the three spigots using 3/4 inch PVC pipe and ran the pipe below grade around to each bed, with risers midway. The risers turn and go through a hole drilled in the top board for a cleaner appearance. The drip delivery uses 1/16 inch holes every 6 inches around a 3-row grid of 3/4 inch PVC. Inline and close to the barrel outlet is a Toro battery-powered ball valve timer to deliver water each day for a specified interval (here is another timer that should work) . I'm still working out what interval will deliver the estimated 2 plus inches of moisture per week I'll need (equivalent to 100 gallons or about 2/3 of my rain barrel capacity).


Mulching
I haven't done this yet, but it makes sense that a layer of mulch will conserve water and keep the soil a bit cooler. Things heat up fast in a raised bed!
First Planting
Bed 1 has cherry tomatoes (Sweet Baby Girl), peppers, kale, borage, and carrots. Bed 2 has large-fruit tomatoes (Garden Treasure), peppers, eggplants, and herbs. Bed 3 has pole beans, peas, basil and more herbs. In addition, bed 3 includes several zucchini and melons that I intend to cascade over the bed walls when mature. All beds include a row of marigolds for low-tech pest control! As the season progresses I'll take note of what's working according to plan, and what is not!


